This guide is for people looking to add quickly thebe to a static HTML website start an interactive session using binder. It's not just for static HTML, you can also follow this to add thebe to any website where you can add script tags to the <head> and target code on your page using a stable css selector.
Let's get started! 🚀
Loading scripts, styles & configuration
Add the following to the <head> section of your HTML:
1 2<script type="text/javascript" src="https://unpkg.com/thebe@rc/lib/index.js"></script> <link rel="stylesheet" href="https://unpkg.com/thebe@thebe@rc/lib/thebe.css" />
This will:
- Load the javascript bundle for the latest Release Candidate version of
thebe. - Load the styles for the same version, including the styles you'll need for rendering Juptyer outputs and ipywidgets properly.
Configure thebe to work with binder
Next, let's assume you want to use the public mybinder.org with a github repository that holds your Reproducible Execution Environment Specification. In this example, that repo is https://github.com/executablebooks/thebe-binder-base and the equivalent configuration options would be:
1 2 3 4 5 6 7 8<script type="text/x-thebe-config"> { useBinder: true, binderSettings: { repo: "executablebooks/thebe-binder-base" } } </script>
This is very compact as thebe will assume the default repository provider is github and target ref/branch is HEAD.
Add some UI elements
Thebe provides some default UI componponents that can be customixed via css. To add these components to your page add the following html elements in desired location.
Add at least the first element to have a way to activatethebe.
<div class="thebe-activate"></div>
<div class="thebe-status"></div>Then extend the configuration script that you added above to enable the widgets, like so:
1 2 3 4 5 6 7 8 9 10<script type="text/x-thebe-config"> { useBinder: true, binderSettings: { repo: "executablebooks/thebe-binder-base" }, mountActivateWidget: true, mountStatusWidget: true, } </script>
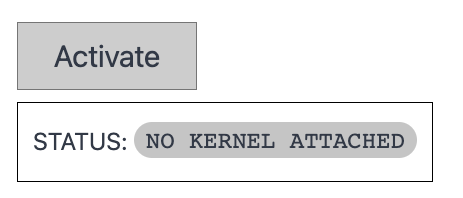
Provided that the thebe script and styles are properly loaded, when you refresh the page the following elements should appear.

Pressing activate should establish a connection to mybinder.org but before you do that! Let's make sure that thebe will be able to find the source code on your site.
Customising the source code selector
By default thebe will look for html elements the [data-executable] attribute attached, whether they are div,pre, code, spans or whatever. Rather than having to update your code elements across your site you may want to modify the selector that is used.
You can do so by extending the configuration object with an additional option that accepts any valid css selector. For example, here we are targetting both pre elements that carry the source-code class as well as any code tags:
1 2 3 4 5 6 7 8 9 10 11<script type="text/x-thebe-config"> { useBinder: true, binderSettings: { repo: "executablebooks/thebe-binder-base" }, mountActivateWidget: true, mountStatusWidget: true, selector: `pre.source-core, code` } </script>
Now thebe should be enabled on your site and your visitors can do some interactive computing 🎉!