This guide is for people looking to add quickly thebe and thebe-lite to a static HTML website for in-browser jupyterlite powered WASM computation. It's not just for static HTML, you can also follow this to add thebe to any website where you can add script tags to the <head> and target code on your page using a stable css selector.
Let's get started! 🚀
Using thebe-lite in React
If you are using the thebe-react providers and hooks and want to add thebe-lite into your app, see the thebe-react specific docs here.
Loading scripts, styles & configuration
Add the following to the <head> section of your HTML:
1 2 3 4 5 6<script type="text/javascript" src="/thebe-lite.min.js" ></script> <script type="text/javascript" src="/index.js"></script> <link rel="stylesheet" href="/thebe.css" />
This is dependent on you making thebe and thebe-lite available as part of your deployment, it is not possible to load thebe-lite from unpkg.com. This code will:
- Load the latest javascipt bundle for
thebe-lite. - Load the javascript bundle for
thebe. - Load the styles you'll need for rendering Juptyer outputs and ipywidgets properly.
You should include the following files in your deployment:
thebe-lite/dist/lib/*.jsthebe/lib/*.js,*.css
Configure thebe to use JupyterLite
Enable the JupyterLite server by adding the follow configuration script to the <head> of your webpage, above the <script> tags that load thebe-lite:
1 2 3 4 5 6<script type="text/x-thebe-config"> { useBinder: false, useJupyterLite: true, } </script>
thebe-lite is currently limited to using the pyodide kernel. By default, thebe-lite will look for python (WASM) wheels (.whl) on relative paths, meaning you have to take care to also deploy them and ensure they are reachable on the expected url paths (more on that in thebe-lite options).
But we can avoid that by overriding some JuptyerLite settings directly, and load the wheels from CDN. This makes inital setup much easier!
Do this by adding an additional script to the <head> of your page, above the <script> tags that load thebe-lite:
1 2 3 4 5 6 7 8 9 10 11 12<script id="jupyter-config-data" type="application/json"> { "litePluginSettings": { "@jupyterlite/pyodide-kernel-extension:kernel": { "pipliteUrls": ["https://unpkg.com/@jupyterlite/pyodide-kernel@0.0.7/pypi/all.json"], "pipliteWheelUrl": "https://unpkg.com/@jupyterlite/pyodide-kernel@0.0.7/pypi/piplite-0.0.7-py3-none-any.whl" } }, "enableMemoryStorage": true, "settingsStorageDrivers": ["memoryStorageDriver"] } </script>
Note due to the namin convention of the piplite wheel, it's necessary to keep this updated to the latest version manually.
Add some UI elements
Thebe provides some default UI componponents that can be customixed via css. To add these components to your page add the following html elements in desired location.
Add at least the first element to have a way to activatethebe.
<div class="thebe-activate"></div>
<div class="thebe-status"></div>
Then extend the configuration script that you added above to enable the widgets, like so:
1 2 3 4 5 6 7 8<script type="text/x-thebe-config"> { useBinder: false, useJuptyerLite: true, mountActivateWidget: true, mountStatusWidget: true, } </script>
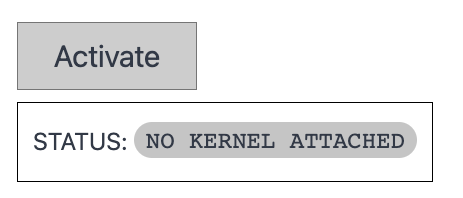
Provided that the thebe script and styles are properly loaded, when you refresh the page the following elements should appear.

Pressing activate should start the in-browser Juptyer server and setup the kernel but before you do that! Let's make sure that thebe will be able to find the source code on your site.
Customising the source code selector
By default thebe will look for html elements the [data-executable] attribute attached, whether they are div,pre, code, spans or whatever. Rather than having to update your code elements across your site you may want to modify the selector that is used.
You can do so by extending the configuration object with an additional option that accepts any valid css selector. For example, here we are targetting both pre elements that carry the source-code class as well as any code tags:
1 2 3 4 5 6 7 8 9 10 11<script type="text/x-thebe-config"> { useBinder: true, binderSettings: { repo: "executablebooks/thebe-binder-base" }, mountActivateWidget: true, mountStatusWidget: true, selector: "pre.source-core, code" } </script>
loading additional packages
JupyterLite doesn't have a mechanism for pre-loading a python environment, so we cannot follow REES to ensure that our code will run as expected.
Instead you need to install any additional packages at runtime using piplite, luckily this is made nice and transparent by the %pip magic command.
For example, in order to install ipywidgets and ipympl on the fly use:
1 2 3%pip install -i ipywidgets ipympl # the rest of your wonderful python code...
And provided that these are available in WASM, they'll install. What is nice about the %pip magic is that it'll also work in a normal jupyter environment meaning your code is still valid everywhere.
Now thebe should be enabled on your site and your visitors can do some interactive computing 🎉!