The documentation of MyST is inspired by the Diataxis Documentation Framework.
Suggest an edit to our documentation directly from the browser
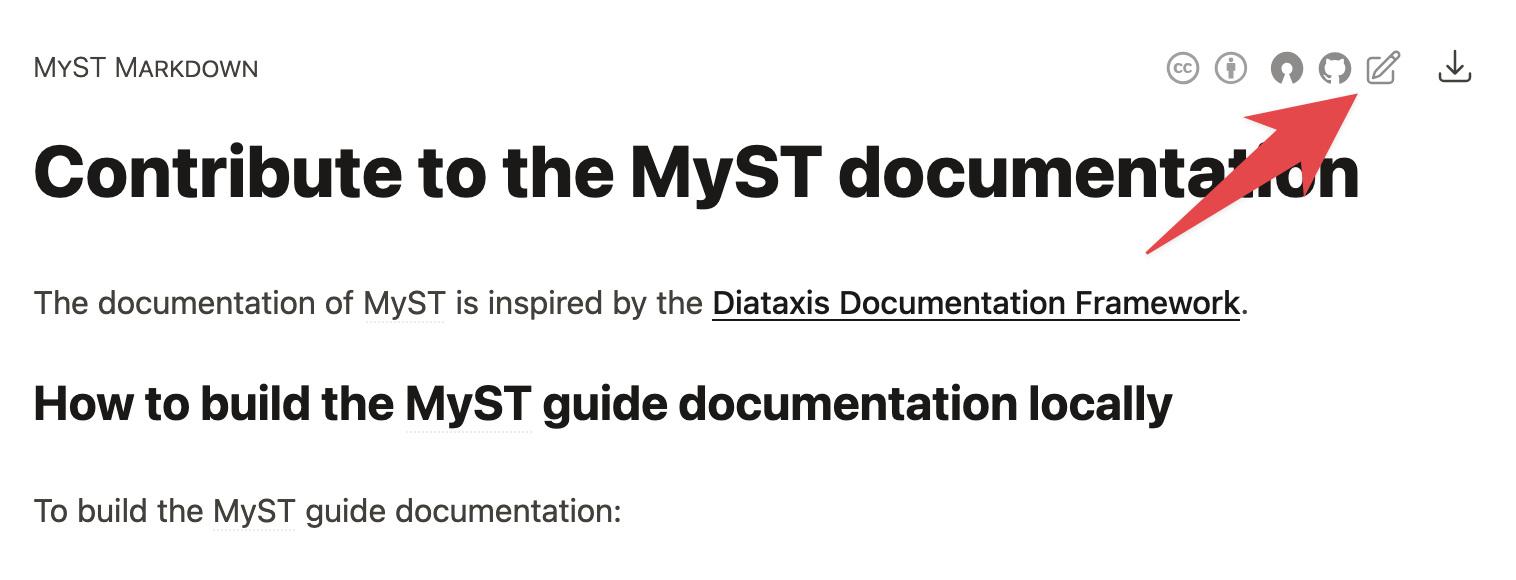
The easiest way to suggest an edit to any Jupyter Book / MyST site is by using the Edit this page button. If you see something you’d like to change on a page, click this button:

An example of the “edit this page” button in a MyST theme. Clicking this button will take you to the source page for this file in GitHub.
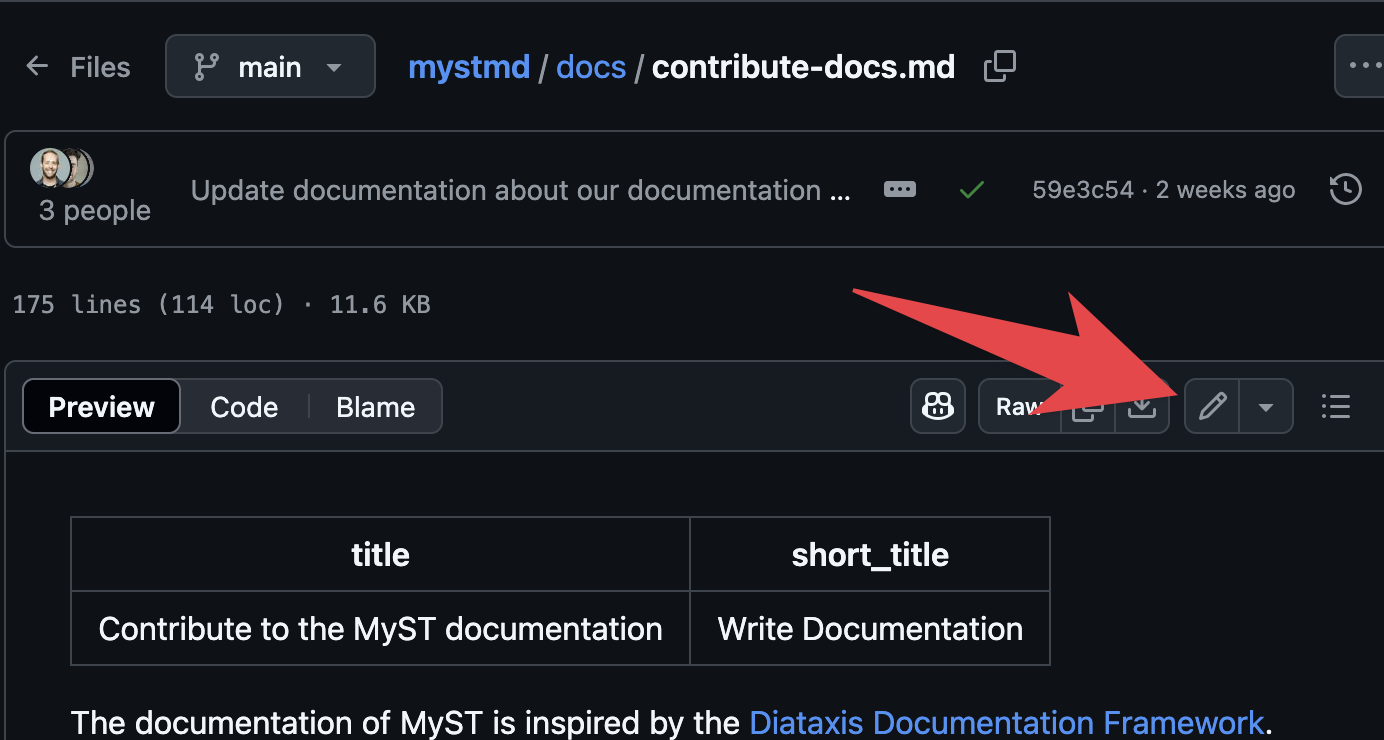
This will take you to the source file for that page on GitHub. Then press the “edit this page” button on GitHub, it looks like this:

An example of the “edit this page” button on GitHub. This will open an interactive window where you can edit the source text.
Alternatively, you can use the github.dev web-based editor to suggest more comprehensive edits to one or more pages. To do so, in the browser URL replace github.com with github.dev[1].
How to build the MyST guide documentation locally
To build the MyST guide documentation:
Clone this repository:
git clone https://github.com/jupyter-book/mystmdNavigate to the docs folder:
cd docs/Start a MyST server to preview the documentation:
myst start
This will build the documentation locally so that you can preview what your changes will look like.
Build with executable content
Some pages in the MyST documentation include executable code cells that demonstrate features. To build the documentation with execution enabled:
Install the Python requirements:
pip install -r requirements.txtBuild with the
--executeflag:myst start --executeOr for a static build:
myst build --html --execute
This will execute all {code-cell} directives in the documentation and include their outputs in the built site.
How to update the live website at mystmd.org
When you change the content here or in most other MyST repositories, it will not automatically update mystmd.org. We use a custom MyST theme that aggregates content from several MyST repositories into a single website. The content for the live website mystmd.org is hosted by Curvenote. To update the content of mystmd.org, dispatch the action on main.
How does the MyST guide content relate to the documentation at mystmd.org
The documentation in this repository serves the content that lives at mystmd.org/guide.
The full content and theme for mystmd.org is hosted at jupyter-book/mystmd.org, which pulls in the content from this folder along with several other documentation sources into one place.
However, the documentation here can be built independently for previewing your changes.
See About the mystmd.org documentation and theme infrastructure for more information about the mystmd.org deployment.
About the mystmd.org documentation and theme infrastructure
The MyST website at mystmd.org is a custom MyST theme designed by the community in order to aggregate documentation from many locations into one website.
The content for mystmd.org is located across several repositories in the MyST ecosystem, and it is deployed via a Curvenote deployment that uses the latest version of our custom
mystmd.orgtheme from Vercel.The theme for mystmd.org is in a repository we manage and deployed via Vercel. (see below for details)
Where is the mystmd.org theme located?
The jupyter
How does the mystmd.org theme work?
The custom MyST theme at jupyter
The MyST documentation uses a custom theme that inherits from a chain of base themes. Here’s a brief overview of where to look for things:
The MyST documentation theme is a custom MyST theme defined in the
jupyter-book/mystmd.orgrepository.It uses a modified version of the MyST Book theme at
jupyter-book/myst-theme: /themes/book/.The
BookandArticlethemes are both located in thejupyter-book/myst-themerepository in the/themesdirectory.Each is programmatically published to a repository in the
myst-templatesGitHub organization for easier and optimized public consumption.
The content of mystmd.org is pulled from a number of repositories across the jupyter-book organization.
For example, mystmd.org/guide is pulled from jupyter-book/mystmd: /docs/, and mystmd.org/jtex is pulled from jupyter-book/mystmd: /jtex/docs/. It also includes some custom applications like the Sandbox and MyST demo on the landing page.
How do I deploy changes to the mystmd.org theme?
After updating the theme at mystmd.org, we must deploy it to Vercel in order to make it available for use.
We use a GitHub Action to deploy to our Vercel project. This will update the theme infrastructure used to power mystmd.org.
To trigger that action, you can either:
Trigger a workflow dispatch. Go to the Vercel action page. Click on Run Workflow and it will run.
Push a commit to
main(of jupyter-book /mystmd .org). Any new commit to the mainbranch will trigger this action.
Where is the Vercel deployment that serves the mystmd.org theme?
Currently the theme is run on Rowan’s personal Vercel project, the deployment is completed in the GitHub Actions and access to this is only needed if the GitHub Action does not deploy.
How do I preview content changes in pull requests?
We use the Netlify service to generate deploy previews of the mystmd documentation for all pull requests.
These build only the mystmd guide (hosted at https://
Configuration for our Netlify build exists in the netlify.toml configuration file in the root of the repository.
Any team members can have Developer access to our shared Netlify account, and Steering Council members can have Owner access.
If you’d like access, please ask a maintainer.
How to choose what to document in jupyterbook.org vs. mystmd.org?
Jupyter Book and the MyST Document Engine have heavily overlapping functionality, so it may be unclear whether something should be documented at mystmd.org or jupyterbook.org. That’s OK and expected - here are some guidelines for where to document things:
The MyST document engine will be a power user tool. It will be more flexible and modular, with an extensive plugin ecosystem. It will be agnostic to build output, and single- or multi-page documents.
MyST should have the complete reference documentation for the MyST engine, as well as longer explanatory content about the MyST ecosystem.
As functionality is moved into plugins, we similarly prioritize reference documentation and explanation in those spaces.
MyST should be a standalone tool and have enough information for a power user to use on its own.
Jupyter Book will be a tool for typical users focused around multi-page documents and websites. It will be opinionated, focused around the “book themes”, and be more accessible to a new user or someone unfamiliar with JavaScript workflows.
Jupyter Book should focus on How-Tos and Tutorials that are driven by use-cases in multi-page workflows (e.g., documentation, books, community websites, etc).
Focus on keeping documentation outcome-oriented, and link heavily to the MyST engine docs for more complete reference information and explanation.
How to create and edit Excalidraw diagrams
We use Excalidraw diagrams throughout our documentation. This is a lightweight way to create flow charts and diagrams.
To create a new Excalidraw diagram, first create what you wish in Excalidraw. Then, take the following steps:
Click the hamburger menu, then export image.
Ensure that embed scene is checked. This will include Excalidraw metadata with the output for future editing.
Click the
SVGbutton (orPNGif necessary). This will download a local file with the diagram.Put that in the
images/folder and link it from your content.
To make edits to an Excalidraw diagram, follow these steps:
Open excalidraw.com.
Find the file that you want to edit.
Confirm that it is an SVG or PNG that was created with Excalidraw, and that had embed scene checked upon creation.
Drag-and-drop that file into the Excalidraw window. (or, click hamburger menu -> open and add your file that way).
Make your edits in Excalidraw.
Export the new diagram using the steps described above.
Replace the old file with the new one and commit it to
git. If using an SVG, you can also just copy/paste the new SVG text and replace the old SVG text with it.
How to enable Pull Request previews on Netlify
Netlify Deploy Previews allow others to preview the documentation for a repository as part of the Pull Request workflow. This will add a Documentation Preview to the Status Checks of a pull request. To enable it, do the following:
Enable Netlify builds for your repository.
Go to the
configuration -> notificationssection and look for emails and webhooks.Go to Deploy Notifications, which lists the notifications that will post to each PR.
To add a new notification, click Add Notification -> GitHub Commit Status.
Ensure the following notifications are listed for deploy state commit checks:
Add deploy state commit checks when Deploy Preview starts
Add deploy state commit checks when Deploy Preview succeeds
Add deploy state commit checks when Deploy Preview fails
How to modify and release a MyST theme
Below is a brief description for how modifications in a theme are released for public consumption.
[dev facing] we make a bunch of changes to the theme, probably changing things in
themes/book/*,themes/article/*andpackages/*[dev facing] if there were changes in
packages/*we release the@myst-theme/*packages (changesets based ci step)[dev facing] we then run
make deploy-bookandmake deploy-articlewhich builds and bundles each theme, making commits to the https://github .com /myst -templates /book -theme and https:// github .com /myst -templates /article -theme repos. [user facing] at that point those latest bundle commits will be what is pulled by
mystmdclients - people who already have those downloaded need tomyst clean --all(as we don’t yet auto bump based on version changes, see #854 for updates).
Alternatively, you can just press . from any GitHub source file page, and it will open a VSCode editor in-browser to let you suggest edits.