These quickstart tutorials are here to get you up and running on your local computer 👩💻. See this overview of the MyST ecosystem for a more conceptual introduction. In this tutorial, you will get up and running from scratch. You will learn how to:
write MyST Markdown 🖊
export PDF, Word and documents 📑
create a website like this one 🌎
🛠 Throughout the tutorial, whenever you’re supposed to do something you will see a 🛠
Install the MyST Markdown CLI
🛠 Install MyST using your preferred packaging ecosystem. (See Install the MyST Markdown Command Line Interface for more details).
Not sure which to pick?
The easiest way to install MyST is with the mamba package manager. mamba is a cross-platform language-agnostic package manager that is useful for users across many data science languages like Python, R, Julia, and JavaScript.
You can install using mamba (https://
🛠 Then install mystmd from conda-forge:
mamba install -c conda-forge mystmdYou may also use conda which comes packaged with the Anaconda python distribution.
🛠 Then install mystmd from conda-forge:
conda install -c conda-forge mystmd🛠 Install mystmd:
pip install mystmd🛠 Ensure mystmd is ready for use:
MyST needs node (https://nodejs.org) in order to run correctly. If node is not already installed, starting myst will prompt you to install it:
$ myst -v
Node.js (node) is required to run MyST, but could not be found.
Install Node.js in '/root/.local/share/myst/18.0.0'? (y/N): y
Attempting to install Node.js in /root/.local/share/myst/18.0.0 ...
Successfully installed Node.js 18.0.0
v1.3.4
Installing Node.js Manually
The mystmd package on PyPI ships with the ability to install node (https://nodejs.org). If you would prefer to install NodeJS manually, see Installing NodeJS:
Ensure your node (https://nodejs.org) is up to date (>v18), see Installing NodeJS.
🛠 Then install mystmd using npm, yarn or pnpm:
npm install -g mystmd🛠 Then, check that MyST has successfully been installed:
$ myst -v
v1.3.4
Build your first MyST site
Next we’ll download some sample content and use MyST to render it as a local web server!
Download example content
We provide an example project that includes a few simple Markdown files and some Jupyter Notebooks. Through the course of the tutorials we will add content to these documents that show off some of the features of MyST.
🛠 Download the example content[1], and navigate into the folder:
git clone https://github.com/jupyter-book/mystmd-quickstart.git
cd mystmd-quickstart
Initialize MyST in the content folder 🚀
Next we will create a myst.yml configuration file that is required to render your project.
🛠 Run myst
The myst command is a shortcut for myst init, which has a few more options for writing specific parts of the configuration file and a table of contents for your site.
$ myst

Welcome to the MyST Markdown CLI!! 🎉 🚀

myst init walks you through creating a myst.yml file.

You can use myst to:

 - create interactive websites from Markdown and Jupyter Notebooks 📈
 - build & export professional PDFs and Word documents 📄

Learn more about this CLI and MyST Markdown at: https://mystmd.org

💾 Writing new project and site config file: myst.yml
Preview your MyST site locally
Preview a rendered version of the quickstart content to make sure that MyST is working properly.
🛠 When prompted, type Yes to install and serve your MyST content locally:
? Would you like to run "myst start" now? Yesor manually serve the quickstart content with the following command:
myst startStarting the server requires a theme, this will download the default book-theme from the MyST themes.
This can take up to a minute the first time, and then will be cached in the _build/templates directory.
🐕 Fetching template metadata from https://api.mystmd.org/templates/site/myst/book-theme
💾 Saved template to path _build/templates/site/myst/book-theme
⤵️ Installing web libraries (can take up to 60 s)
📦 Installed web libraries in 13 s
📖 Built interactive-graphs.ipynb in 21 ms.
📖 Built paper.md in 32 ms.
📖 Built README.md in 35 ms.
📚 Built 3 pages for myst in 82 ms.

  ✨✨✨  Starting Book Theme  ✨✨✨

⚡️ Compiled in 524ms.

🔌 Server started on port 3000!  🥳 🎉

  👉  http://localhost:3000  👈
🛠 Open your web browser to http://localhost:3000[2]
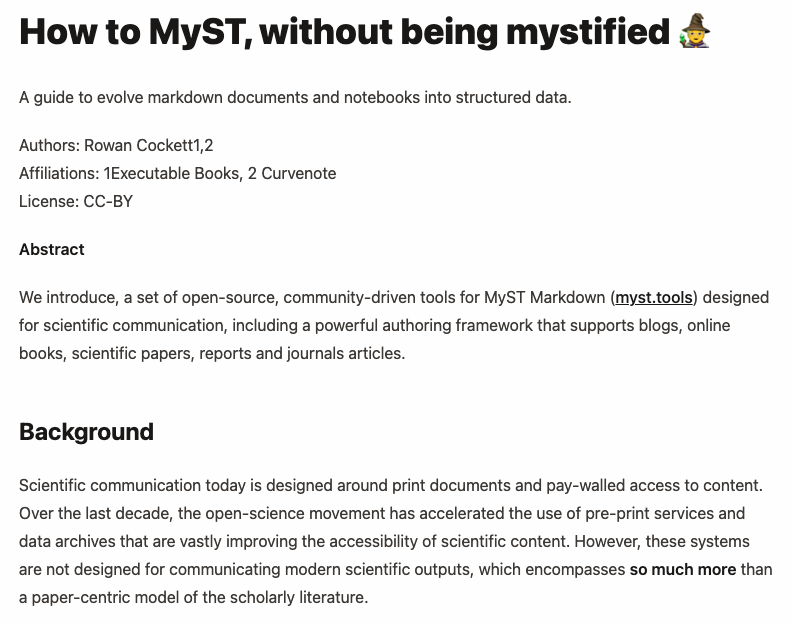
The example site in this tutorial only has three pages and by default the 01-paper.md page is seen in Figure 1, which has minimal styles applied to the content.

Figure 1:The myst theme for the 01-paper.md page without any changes made.
🎉 Congratulations, you just built your first MyST site!
Configuration and structure
The final section of this tutorial takes a closer look at the files that we just created, and aspects of your MyST project that can be customized.
Folder Structure
If you are using a text editor, for example VSCode, open up the folder to explore the files:
quickstart/
  ├── 🆕 _build
  │   ├── exports
  │   ├── site
  │   │   ├── content
  │   │   ├── public
  │   │   └── config.json
  │   ├── temp
  │   └── templates
  │       ├── site/myst/book-theme
  │       └── tex/myst/arxiv_two_column
  ├── images
  │   ├── image.png
  │   └── image.gif
  ├── 01-paper.md
  ├── 02-notebook.ipynb
  ├── README.md
  └── 🆕 myst.yml
Running myst init added:
myst.yml- the configuration file for your myst project and site_build- the folder containing the processed content and othersiteassets, which are used by the local web server.
The _build folder also contains your templates (including the site template you installed) and any exports you make (when we build a PDF the exported document will show up in the _build/exports folder). You can clean up the built files at any time using myst clean[3].
Configure site and page options
If we open and look inside our myst.yml we will see a basic configuration like this:
# See docs at: https://mystmd.org/guide/frontmatter
version: 1
project:
  # title:
  # description:
  keywords: []
  authors: []
  # github:
  # bibliography: []
site:
  template: book-theme
  # title:
  # options:
  #   logo: my_logo.png
  nav: []
  actions:
    - title: Learn More
      url: https://mystmd.org/guide
domains: []There are two important parts to the myst.yml:
project:- The project holds metadata about the collection of files, such as authors, affiliations and licenses for all of the files, any of these values can optionally be overridden in a file. To see all of the options see Content frontmatter options, which includes which fields can be overridden by files in the project.
site:- The site holds template information about the website, such as the logo, navigation, site actions and which template to use.
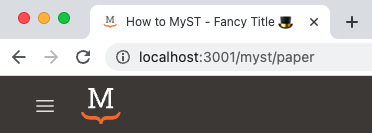
🛠 In myst.yml: Change the “# title:” comment in site to “title: Fancy Title 🎩” and save
Saving the myst.yml will have triggered a “full site rebuild”[4].
Take a look at the browser tab and you’ll see that it has updated:

Figure 2:The site title will control site meta tags, and the browser-tab title, which is appended to each page title in the book-theme.
Next steps ➡️
That’s it for this quickstart tutorial!
You’ve now got MyST installed locally, and the basic structure of a MyST project ready to improve.
You are well on your way to getting started with myst.
Here are some things to try for next steps:
Organize a Table of contents
Configure website downloads
Check out the following tutorials for more step-by-step guides:
Write scientific articles using MyST Markdown with easy-to-use citations, metadata, and cross-references.
Learn how to use computation and execution with Jupyter in MyST.
Export MyST documents to a Word document, PDF, and !
See an overview of MyST Markdown syntax with inline demos and examples.
Learn how to use MyST in Jupyter Interfaces.
If you aren’t familiar with git, it isn’t required for this tutorial, you can download the zip file with the contents from the quickstart repository.
If port
3000is in use on your machine, an open port will be used instead, follow the link provided in the terminal.By default the
myst cleancommand doesn’t remove installed templates or cached web responses; however, the function can with a:myst clean --all, ormyst clean --templates --cache.Before deleting any folders
mystwill confirm what is going to happen, or you can bypass this confirmation with the-yoption. For example:Deleting all the following paths: - _build/site - _build/templates ? Would you like to continue? Yes 🗑 Deleting: _build/site 🗑 Deleting: _build/templatesIf the server stopped, you can restart the server using
myst start.