🛠 Throughout the tutorial, whenever you’re supposed to do something you will see a 🛠
See the video tutorial 📺
🛠 Install JupyterLab Locally
For this tutorial you must have installed JupyterLab locally (use a version greater than 3.0).
🛠 Install JupyterLab, following the guide at https://
To follow along on without installing anything, you can try to 
Install JupyterLab MyST
🛠 Install the JupyterLab MyST extension version:
pip install jupyterlab_mystSee the GitHub repository, jupyterlab-myst for full installation instructions.
🛠 Verify the installation
To verify that the extension is registered with Jupyter, use:
jupyter labextension listYou should see the following text in the output:
jupyterlab-myst v1.x.x enabled OKDownload quickstart content
We are going to download an example project that includes notebooks for use in JupyterLab with the MyST extension installed.
Our goal will be to try out some of the main features of jupyterlab-myst, including frontmatter, MyST syntax, and inline execution.
🛠 Download the example content, and navigate into the folder:
git clone https://github.com/jupyter-book/jupyterlab-myst-quickstart.git
cd jupyterlab-myst-quickstart
Explore the Notebooks
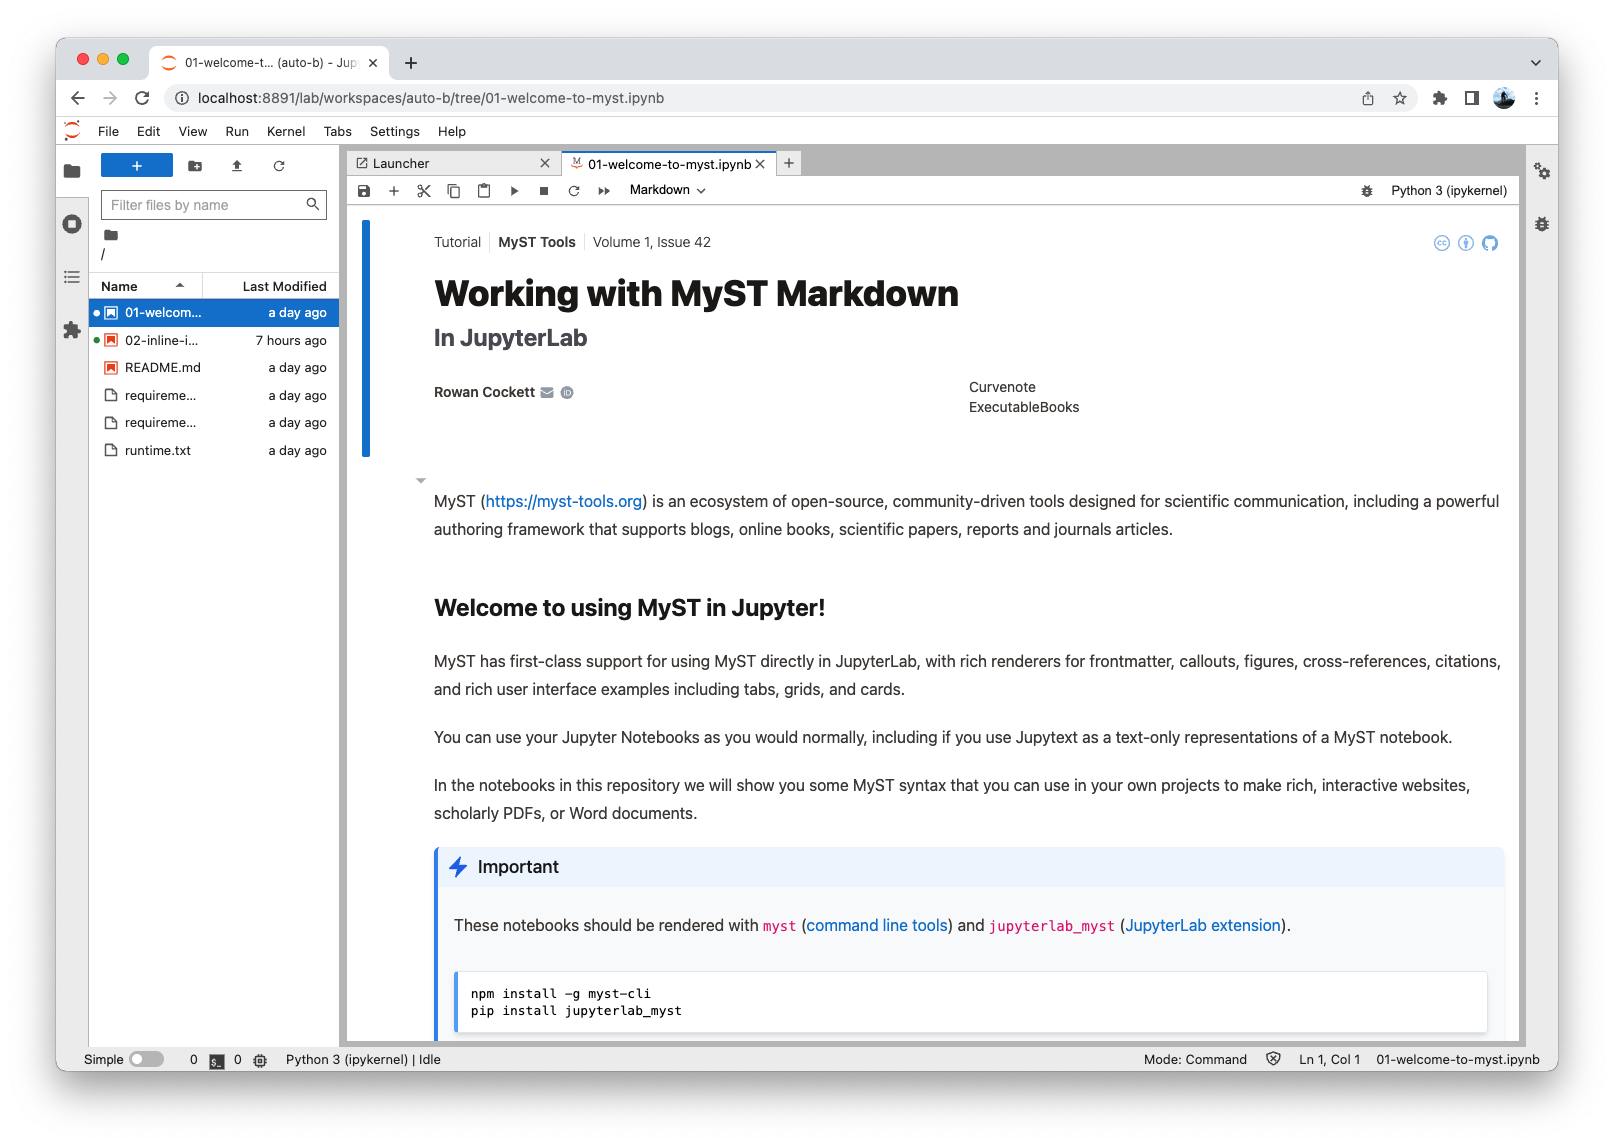
🛠 Launch JupyterLab with jupyterlab-myst activated
jupyter lab
Figure 1:MyST in JupyterLab, showing frontmatter and admonitions that are natively rendered! 🎉
More Coming Soon™
showing frontmatter
advanced user interface elements like tabs, grids, and cards
citations
Inline Expressions
JupyterLab MyST allows you to create and evaluate inline expressions using the {eval} role.
These turn your markdown cells into places that you can quickly evaluate a simple expression, such as:
The value of the variable
x:{eval}`x`Expand a sympy equation
polynomial:{eval}`expand(polynomial)`
Figure 2:Use the {eval}`x` role to evaluate an expression, which can be text, an image, an equation, or even an ipywidgets slider.
Working with ipywidgets
Most widgets will work directly inline, allowing you to place widgets or controls inside of callouts, these can be linked together as normal.
Embed interactive ipywidgets in your markdown cells.
Task Lists
The MyST extension also makes it very easy to edit task lists directly in the rendered view. Then you click a task item, the markdown is automatically updated.
Edit task lists with the jupyterlab-myst plugin directly in the rendered view.
Conclusion 🥳
For now, that’s it for this quickstart tutorial, please see the content in the notebooks or help contribute to the docs to help document these features!
Check out the following tutorials for more step-by-step guides:
Write scientific articles using MyST Markdown with easy-to-use citations, metadata, and cross-references.
Learn how to use computation and execution with Jupyter in MyST.
Export MyST documents to a Word document, PDF, and !
See an overview of MyST Markdown syntax with inline demos and examples.
Learn how to use MyST in Jupyter Interfaces.
If you aren’t familiar with git, it isn’t required for this tutorial, you can download the zip file with the contents from the quickstart repository.
If port
3000is in use on your machine, an open port will be used instead, follow the link provided in the terminal.By default the
myst cleancommand doesn’t remove installed templates or cached web responses; however, the function can with a:myst clean --all, ormyst clean --templates --cache.Before deleting any folders
mystwill confirm what is going to happen, or you can bypass this confirmation with the-yoption. For example:Deleting all the following paths: - _build/site - _build/templates ? Would you like to continue? Yes 🗑 Deleting: _build/site 🗑 Deleting: _build/templatesIf the server stopped, you can restart the server using
myst start.
